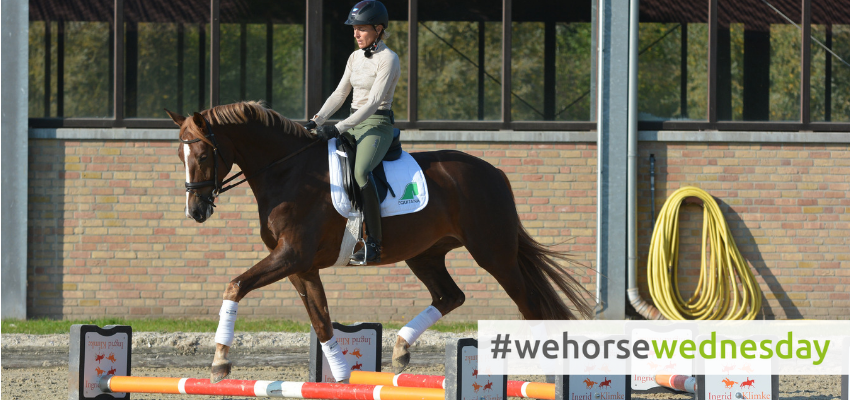
Cavaletti exercises are a great opportunity for horses of all ages and levels to get in some gymnastic work. It strengthens a horse’s muscles and helps to develop rhythm and suppleness. Regardless of your discipline – dressage, jumping or eventing – cavaletti exercises should be a part of every healthy horse’s training program.
Summary
- Why are cavaletti exercises valuable for all horses?
- How frequently should you work with cavalettis?
- Basic rules for your cavaletti exercises
4. Caveletti exercises from easy to difficult
- Simple set-ups in walk and trot
- Cavaletti on curved lines
- Caveletti exercises in trot and canter: the figure eight
Why are cavaletti exercises valuable for all horses?
Working with poles and cavaletti isn’t just a gymnastic work-out, it’s also fun – and not just for the rider! The horse enjoys a little variety in training, is encouraged to be proactive and experiences new challenges. Most horses take great joy in the task and start to push off more actively.
Do you need more motivation to add cavaletti exercises to your training? No problem. Not everyone has a horse with spectacular gaits. Does yours? Then use cavaletti work to improve the cadence of your horse’s gaits. Ingrid Klimke shows you how to most effectively work with a horse of average skill. The cavaletti exercises bring much more expressiveness and power to the horse’s trot.
How frequently should you work with cavalettis?
It should be carried out at regular intervals for optimum training success. Exercising with cavalettis just once every three or four weeks will increase the risk of sore muscles in your horse, and the positive changes that are expected will remain minimal.
Once a week is a good frequency for cavaletti exercises – you’ll see results without overworking your horse. Each horse’s qualities and individual characteristics will naturally play a role in the decision. Some horses find cavaletti exercises to be immense fun. Other must concentrate harder, and will be overtaxed more quickly. For the latter, you must take great care that the reprises are not too long. You don’t want your horse to get discouraged!
With canter work over cavaletti, the same applies to all horses: clearing several cavaletti in succession requires a lot of physical effort. Therefore, don’t ask this too often. It’s better to integrate two sets of four cavaletti exercises for the canter into your dressage training two or three times a week, than to work on this exercise for a half hour on one day!
Basic rules for your cavaletti exercises
1. Sturdy materials and a suitable site
Splinter-free training materials are essential. Check your cavaletti regularly – broken or faulty cavaletti poles can cause injury and should be replaced! Your surface is just as essential: hard surfaces or surfaces with depressions or holes should be avoided at all costs.
2. Riding dressage over cavaletti
Some riders like to combine cavaletti exercises with jumping and throw all their dressage skills overboard. This is a fundamental error that you shouldn’t make! As in dressage, the goal with cavaletti exercises is a loose horse that responds to aids, transmits energy from the back and uses his hindlegs underneath his body. Only then your horse’s gymnastic skills and gaits will be improved. This is what makes cavaletti exercises so valuable!
3. Properly assessing your horse’s level
As with any work with horses, you should never overtax your horse. First, however, you must be able to assess your horse’s current training level and what you can ask of him. If you’re not sure about the amount of work involved in cavaletti training, ask your riding instructor for his or her estimation.
A horse must first get used to this challenge, so always begin with just a few cavaletti and add more only when you feel that your horse has achieved confidence and looseness. The exercises should always be easy at first and then increase in difficulty, even with more advanced horses.
3 cavaletti exercises from easy to difficult
1. Simple set-ups in walk and trot
To familiarise your horse with cavaletti exercises, you can start by walking him over one cavaletti pole. Very young and inexperienced horses will benefit from following a lead horse who appears calm and confident. It’s important that your horse steps over the cavaletti poles calmly and relaxed, and that you support and “close” him up with your aids. Don’t, then, simply throw the rein away, but it is imperative that your horse’s movement is not restricted through the wrong rein aids.
Start off with one cavaletti pole and work up to four poles. The distance between the poles should be about 80 to 90 cm for walking with large horses.
2. Cavaletti on curved lines for more engaged hind legs and suppleness
Working on a curved pattern is especially good for a horse with some cavaletti experience. This will give your horse a stronger workout: use the cavaletti to improve your length bend and encourage your horse to step under better with the inside hind leg.
An exercise you can recreate: divide the arena into two circles, leaving some place between them if you have enough room to do so. On the outside of the left-hand circle, place four cavaletti on a curved line, to walk over. The distance between the midpoints of each cavaletti to its neighbors should be 80-90 cm for larger horses. On the right-hand circle, place four cavaletti to trot over on the outside of the curved line, with a distance of 1.20 m to 1.30 m. This way you can vary between the circles and improve suppleness in both walking and trotting.
You can place a circle without cavaletti in the middle, for collecting or rest intervals.
Another possibility: ride in a large figure eight. At the transition point, slow down from a trot to a walk to switch to the cavaletti for the walk or, conversely, begin to trot there, to break the horse in to the trot cavaletti.
3. Cavalettis exercises in trot and canter on the figure eight – THE test for lightness.
When you can do the above two exercises flawlessly, you can then go a level higher and add the cavaletti on the canter. In the beginning, don’t use more than two cavaletti so that you won’t overtax your horse. Placed on a straight line at 3 meter intervals, they present your horse with a challenging task. Once your horse has mastered this cavaletti-canter, you can also try it on curved lines.
If you’re successful, you can move on to the next exercise. Divide a circle into two halves and on one side set up four trot cavaletti with the same measurements as in exercise 2 (if you imagine the circle as a clock face, then at 9 o’clock). Place four canter cavaletti on the other side (at 3 o’clock). For larger horses, the cavaletti should be laid so that the outside ends are 3 meters apart and the inside ends are 2 meters apart. On each half of the circle, mark 12 o’clock and 6 o’clock as the transition points. Before the canter cavaletti, canter to the transition point, after the canter cavaletti slow to a trot at the next transition point and ride over the trot cavaletti.
This exercise requires not only familiarisation with the cavaletti, but also responsiveness from your horse. You must be able to bend and collect your horse respectably, and he must react promptly to your aids and pay attention to you. Here too: don’t overdo it with this exercise – less is more! If you notice that the figure eight with trot and canter cavaletti is still a little too hard, or if your horse pushes away his back or resists, then go back a step, review your dressage basics and practice, for example, just the trot cavaletti or just the canter cavaletti separately for a while.

